
- Introduction: Sharing a Personal Passion for Model Airplanes
- Section : The History and Evolution of Model Airplanes
- Subsection : Early Beginnings of Model Aviation
- Subsection : Progression of Model Airplane Designs and Materials
- Section : Getting Started with Model Airplanes
- Subsection : Choosing your First Model Airplane Kit
- Subsection : Necessary Tools and Materials for Building
- Section : The Art of Building Model Airplanes
- Subsection : Understanding the Instructions and Kit Components
- Subsection : Assembling the Airplane: Tips and Tricks
- Subsection : Painting and Detailing Your Model Airplane
- Section : The Thrill of Flying Model Airplanes
- Subsection : Preparation before the First Flight
- Subsection : Basic Flight Techniques for Beginners
- Subsection : Advanced Flying Techniques for Experienced Pilots
- Section : The Benefits of Model Airplane Hobby
- Subsection : Educational Benefits
- Subsection : Mental and Physical Health Advantages
- Subsection : Community and Social Aspects
- Conclusion: Encouraging Others to Explore the Joy of Flight
Introduction: Sharing a Personal Passion for Model Airplanes
There's a distinct pleasure that comes from holding a model airplane in your hands, a miniature representation of the magnificent machines that soar through our skies. The joy of flight, in tangible form, holds a fascination for many. For me, it's more than just a hobby; it's a passion that has been cultivated over many years. My journey with model airplanes began in childhood, as I watched in awe as these tiny replicas took flight, mimicking the real things I'd seen in books and on TV.
Model airplanes are not just toys, they are educational tools that teach us about aerodynamics, engineering, and the history of aviation. They are also a form of art, requiring patience, precision, and an eye for detail. Whether you're a seasoned modeler or a beginner just starting out, this blog will provide you with valuable insights about building and flying model airplanes. So, fasten your seatbelts and get ready for an exciting journey into the world of model aviation.
Section : The History and Evolution of Model Airplanes
The history of model airplanes dates back to the early 20th century, a time when the world was just beginning to explore the possibilities of manned flight. The earliest models were simple, often made from wood or paper, and were used primarily as teaching tools or decorations. However, as the technology behind real airplanes evolved, so did the models. They became more sophisticated, incorporating design elements from the latest aircraft.
In the 1930s, the advent of model airplane kits marked a significant turning point in the hobby. These kits came with pre-cut pieces and detailed instructions, making it easier for enthusiasts to build their models. Brands like Revell and Airfix became household names, and the hobby started to gain mainstream popularity.
Fast forward to today, and the world of model airplanes has evolved into an industry in its own right. Modern model airplanes are often highly detailed, with accurate scale representations of real aircraft. Some are even powered by miniature jet engines or electric motors and can be flown just like the real thing. According to the Academy of Model Aeronautics, there are over 185,000 active modelers in the United States alone, highlighting the enduring popularity of this hobby.
Subsection : Early Beginnings of Model Aviation
The origins of model aviation can be traced back to the late 19th and early 20th centuries. During this era, inventors and pioneers in the field of aviation were using scale models to test the principles of flight. The Wright Brothers, for example, used a series of aeronautical experiments with kites and gliders before developing their famed powered aircraft.
These early scale models were primarily made of wood and paper, and their simplicity was a reflection of the limited understanding of aerodynamics at the time. It wasn't until the 1920s and 1930s, with advances in technology and materials, that model airplanes began to take on a form that is more recognizable to modern enthusiasts.
During this time, balsa wood became the material of choice for model airplane construction due to its lightweight and easy-to-work properties. The development of rubber band powered engines also allowed these models to fly, further increasing their popularity. This marked the birth of free flight model aviation, a form of the hobby where models are launched and allowed to fly uncontrolled until they land.
Subsection : Progression of Model Airplane Designs and Materials
As the field of aviation advanced, so did the design and materials used in model airplanes. By the mid-20th century, the introduction of plastic model kits revolutionized the hobby. These kits were easier to assemble, more durable, and allowed for greater detail and accuracy in the models. The popularity of these kits skyrocketed, cementing model airplane building as a mainstream hobby.
In the 1950s and 1960s, the advent of radio control technology brought a new dimension to the hobby. Modelers could now control their airplanes in flight, performing maneuvers and stunts that were once only possible with full-sized aircraft. This period also saw the introduction of new materials like foam and fiberglass, which offered a balance of strength, weight, and flexibility.
The progression of model airplane designs and materials didn't stop there. Today's model airplanes can be made from a variety of materials, including balsa wood, foam, plastic, and even metal. Technological advancements have also enabled the use of electric motors, miniature jet engines, and sophisticated radio control systems. This evolution has allowed model airplanes to become more than just static models; they're now fully functional, miniature replicas of their full-size counterparts.
Section : Getting Started with Model Airplanes
Diving into the world of model airplanes can seem daunting at first, but with the right guidance, it can be an incredibly rewarding hobby. Getting started with model airplanes involves understanding the basics, acquiring the right tools and materials, and learning the skills necessary to build and fly these miniature aircraft.
Firstly, it's important to familiarize yourself with the different types of model airplanes. Static models are non-flying replicas built for display, while flying models are designed to be flown. Flying models can be further categorized into free-flight, control-line, and radio-controlled models.
Once you've decided on the type of model airplane you'd like to build, it's time to gather your tools and materials. A basic model airplane kit will typically include the parts needed to build the model, such as the fuselage, wings, and tail surfaces, as well as the necessary hardware. Tools you'll need include a hobby knife, a cutting mat, sandpaper, and adhesive. Some kits may also require paint and a paintbrush for detailing.
Building your first model airplane requires patience and precision. Start by carefully reading the instructions that come with your kit. Follow each step closely, taking your time to ensure each piece is properly aligned and securely attached. Remember, the goal is not just to finish the build, but to enjoy the process.
Finally, if you've chosen to build a flying model, you'll need to learn the basics of flying. This can involve understanding the principles of aerodynamics, learning how to control the model in flight, and knowing how to perform basic maintenance and repairs.
Embarking on your model airplane journey can be a thrilling adventure. With time and practice, you'll be able to build and fly models that bring you joy and satisfaction.
Subsection : Choosing your First Model Airplane Kit
Choosing your first model airplane kit is an exciting step in your model aviation journey. However, with the myriad of options available, it can also be a bit overwhelming. Here are a few factors to consider to help you make the right choice.
Firstly, consider your skill level. If you're a beginner, it's advisable to start with a simple kit. These kits typically have fewer parts and require less intricate detailing, making them perfect for honing your basic building skills. Brands like Revell and Airfix offer a variety of beginner-friendly kits that you can choose from.
Next, decide between a static and a flying model. If you're primarily interested in the building aspect of the hobby, a static model might be the best choice. However, if you're excited by the prospect of flying your model airplane, consider a kit for a flying model.
Thirdly, consider the type of aircraft you're interested in. Model airplane kits come in a wide range of aircraft types, from vintage biplanes to modern jet fighters. Choose a model that catches your eye and sparks your interest.
Lastly, consider the scale of the model. Model airplanes are scaled-down replicas of full-sized aircraft. Common scales include 1:72, 1:48, and 1:32, with 1:72 being the smallest. Smaller scales will result in a smaller finished model, but they can also be more challenging due to the smaller parts.
Remember, the goal is to choose a kit that you'll enjoy building. So take your time, do your research, and choose a kit that excites you. Happy building!
Subsection : Necessary Tools and Materials for Building
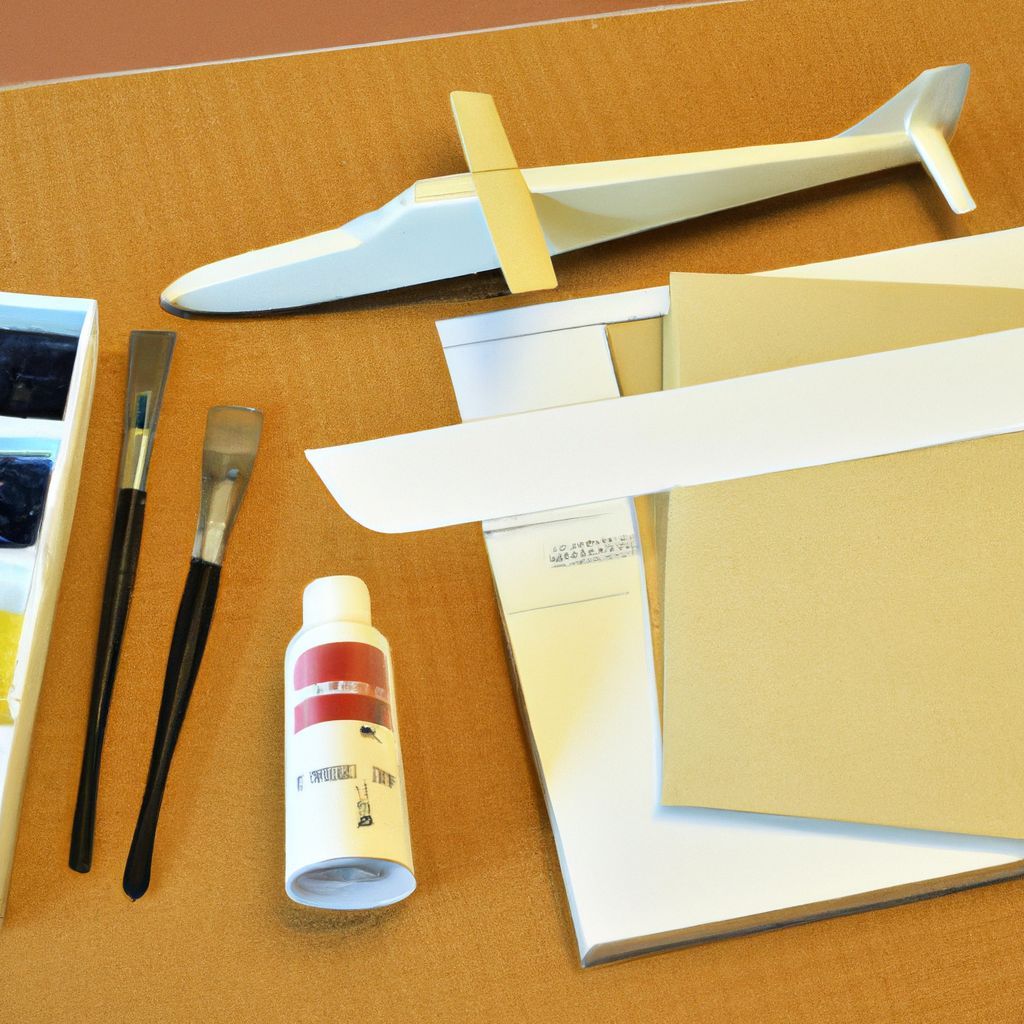
Building a model airplane requires a range of tools and materials. Having the right ones at your disposal can make the building process smoother and more enjoyable. Here's a list of the essentials you'll need:
- Hobby Knife: This is your primary tool for cutting out parts from the sprue (the frame that holds the parts in a kit) and trimming excess material.
- Side Cutters: These can be used in conjunction with the hobby knife to remove parts from the sprue, particularly those that are thicker or more difficult to reach.
- Tweezers: These are useful for handling and positioning small or delicate parts.
- File or Sandpaper: These are used to smooth out rough edges or remove excess material.
- Glue: Specialized model glue is necessary for assembling your model. There are different types, including polystyrene cement and super glue, each with its own advantages.
- Paints and Brushes: These are used to add color and detail to your model. Acrylic paints are commonly used due to their ease of use and fast drying time.
- Clear Coat: This is applied as a final layer to protect the paint and give your model a finished look. It can be either matte or glossy, depending on the desired effect.
These are just the basics. As you progress in the hobby, you may find yourself adding more specialized tools to your kit, such as airbrushes for painting, pin vices for drilling, and clamps for holding parts together while the glue dries. Remember, every modeler's toolkit is unique and tailored to their own style and preferences.
Section : The Art of Building Model Airplanes
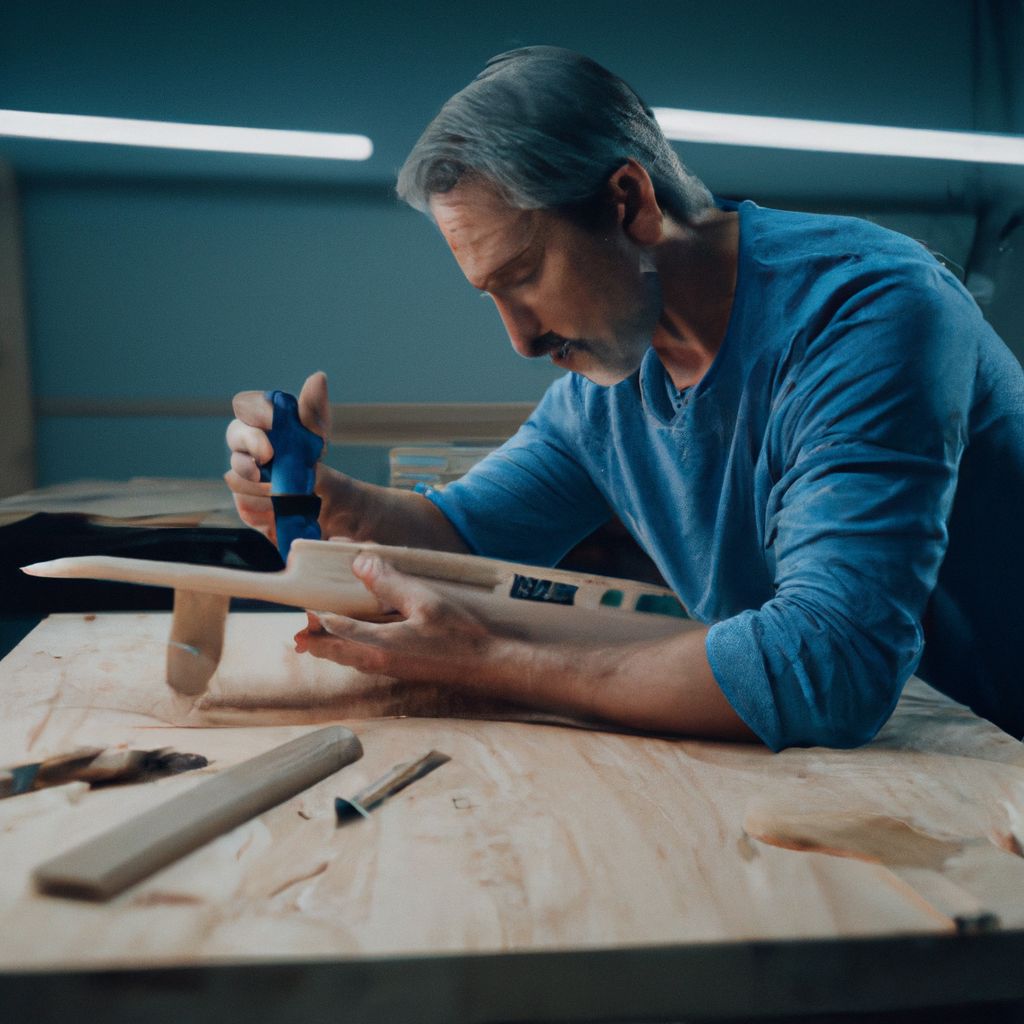
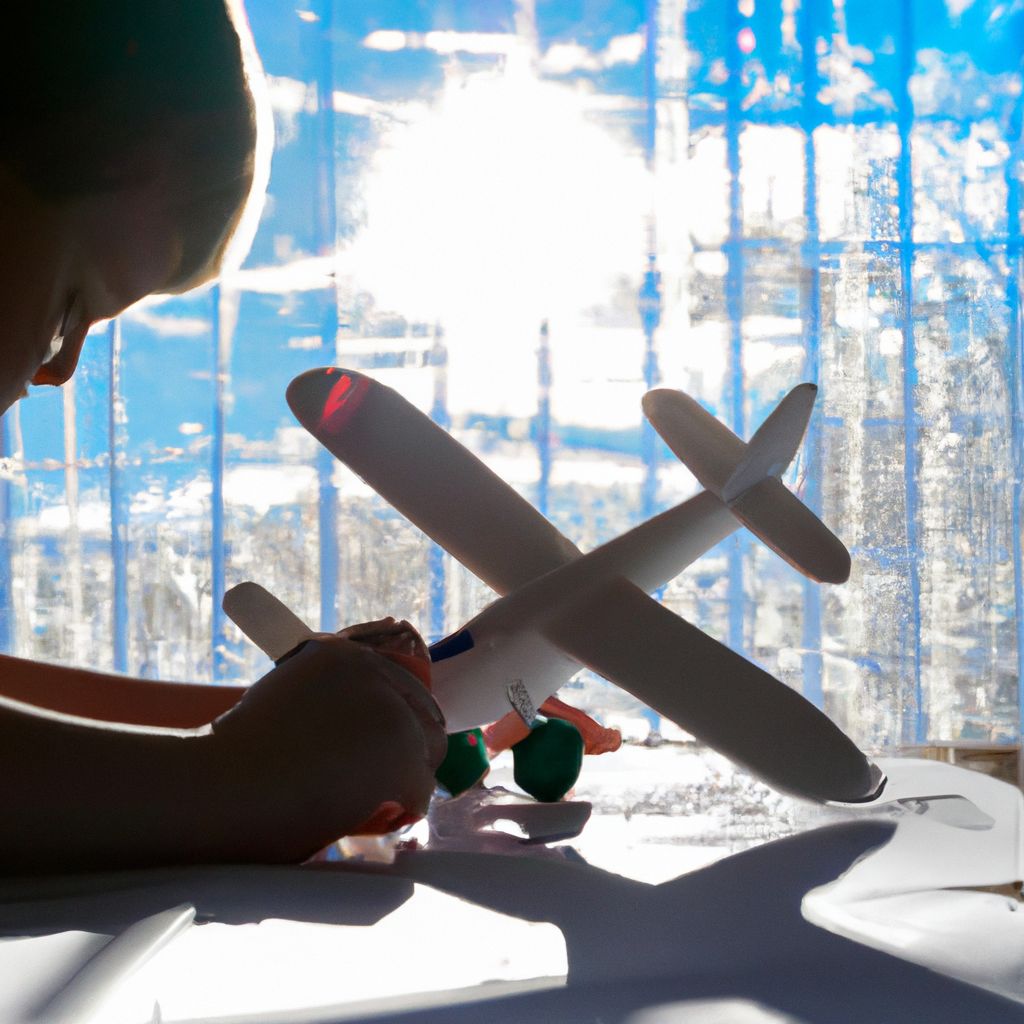
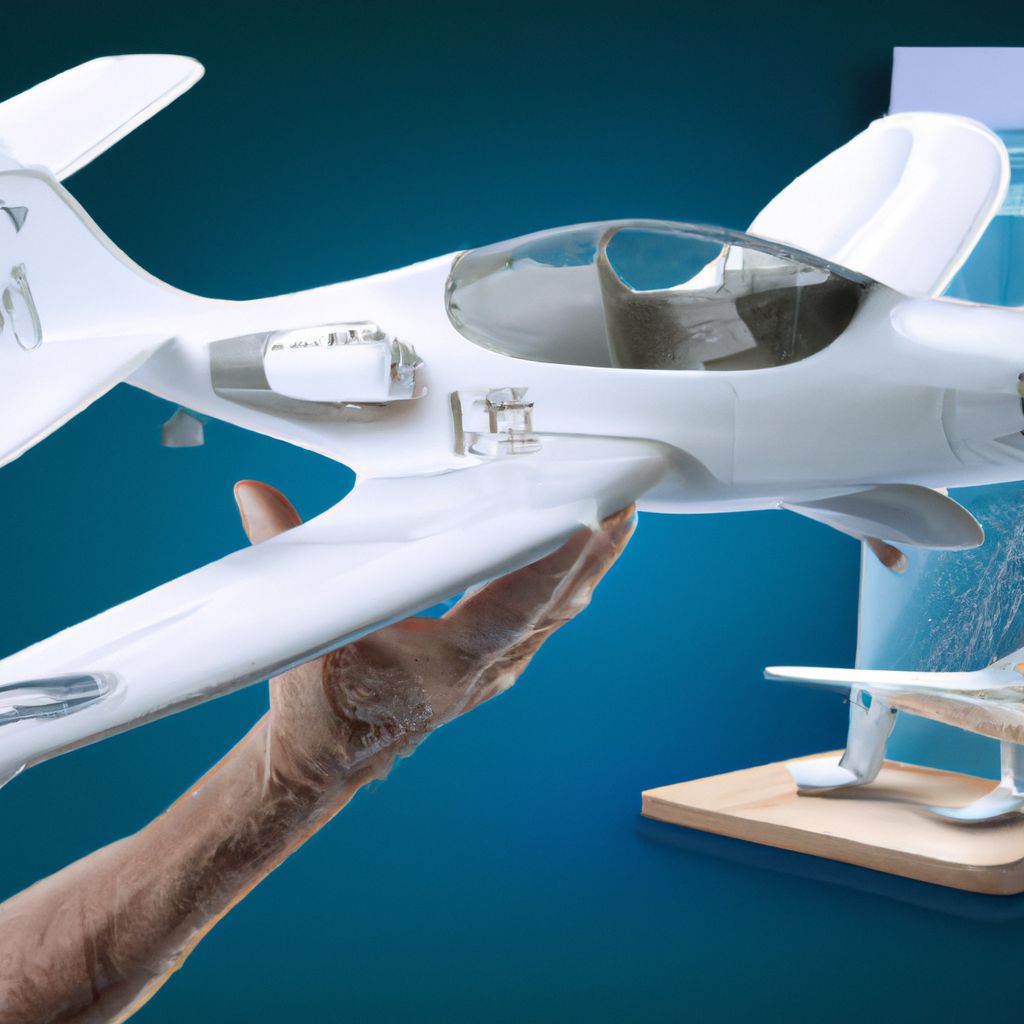
Building model airplanes is an art that combines precision, patience, and creativity. From the careful assembly of tiny parts to the meticulous painting of intricate details, each step of the building process is a testament to the modeler's skill and dedication.
The first step in building a model airplane is to carefully remove the parts from the sprue, using a hobby knife or side cutters. This must be done delicately to avoid damaging the parts. Once the parts are removed, they are typically cleaned up using a file or sandpaper to remove any excess material or rough edges.
Next comes the assembly process. This involves gluing the parts together in the order specified by the instructions that come with the kit. Precision is key in this step, as any misalignment can affect the overall look and functionality of the model.
The assembled model is then painted. This step allows the modeler to showcase their creativity, as they can choose to follow the suggested color scheme or come up with their own. Painting requires a steady hand and an eye for detail, as the goal is to highlight the model's features without obscuring its details.
Once the paint is dry, decals are applied to add more detail to the model. These are tiny stickers that represent markings and insignia found on real aircraft. Applying decals can be tricky, as they are delicate and must be placed accurately.
The final step is to apply a clear coat to protect the paint and give the model a finished look. This can be either matte or glossy, depending on the desired effect.
Building a model airplane is a process that requires time and patience. But with each completed model, you'll gain a sense of accomplishment and a beautiful piece of art to display. In the words of Leonardo da Vinci, "Art is never finished, only abandoned". So don't strive for perfection, but rather, enjoy the process and keep learning and improving with each build.
Subsection : Understanding the Instructions and Kit Components
Before diving into the assembly process, it's crucial to familiarize yourself with the instructions and components included in your model airplane kit. This understanding will serve as a roadmap guiding you through the building process, ensuring a successful and enjoyable experience.
The instructions provided with model airplane kits are usually comprehensive, containing a list of components, a step-by-step guide to assembly, and sometimes even painting and decaling guidelines. The instructions are typically illustrated, with each part represented by a number corresponding to the number on the sprue. Reading and understanding these instructions thoroughly before starting your build can save a lot of confusion and potential mistakes down the line.
Model airplane kits usually come with several sprues containing all the parts needed to build the model. These parts can range from large pieces like wings and fuselage sections, to tiny parts like landing gear and cockpit details. It's helpful to take time to identify these parts and understand where they fit into the model according to the instructions.
Most kits also include decals, which are miniature stickers used to add markings and details to the finished model. Understanding how and when to apply these decals is crucial, as they can greatly enhance the final appearance of your model.
Finally, some kits may include additional materials such as glue or paint, while others may require you to purchase these separately. Be sure to check the kit's contents and requirements before starting your build.
Remember, building a model airplane is not a race, but a journey. Take your time, enjoy the process, and don't hesitate to seek help or advice if you encounter any challenges along the way.
Subsection : Assembling the Airplane: Tips and Tricks
Assembling a model airplane can be a test of patience and precision, but with the right approach, it can also be a rewarding and enjoyable experience. Here are some tips and tricks to help you along the way.
- Organize your workspace: Keep your workspace clean and organized. Having a dedicated area for building can make the process less stressful and more efficient.
- Read the instructions: Before you start, read through the instructions thoroughly to familiarize yourself with the steps and components. It's always better to have an overall understanding of the process before diving in.
- Test fit before gluing: Always test fit the parts before applying any glue. This can help you identify any issues with alignment or fitment early on.
- Patience with glue: When it comes to glue, less is more. Apply it sparingly to avoid excess glue seeping out and spoiling the finish. Also, give the glue ample time to dry before handling the parts.
- Take your time: Don't rush the assembly process. Take your time to ensure each part is properly aligned and fitted. Remember, the joy is in the journey, not just the destination.
- Painting: If possible, paint parts while they're still on the sprue. This makes handling small parts easier and ensures a more even coat of paint.
- Decals: Apply decals after the paint has fully dried. Use decal solution to soften the decals and help them conform to the model's surface.
These are just a few tips to help you get started. As you gain experience, you'll develop your own techniques and preferences. Remember, every modeler's approach is unique, and what works best for you might be different from what works for others. The most important thing is to enjoy the process and learn from each build.
Subsection : Painting and Detailing Your Model Airplane
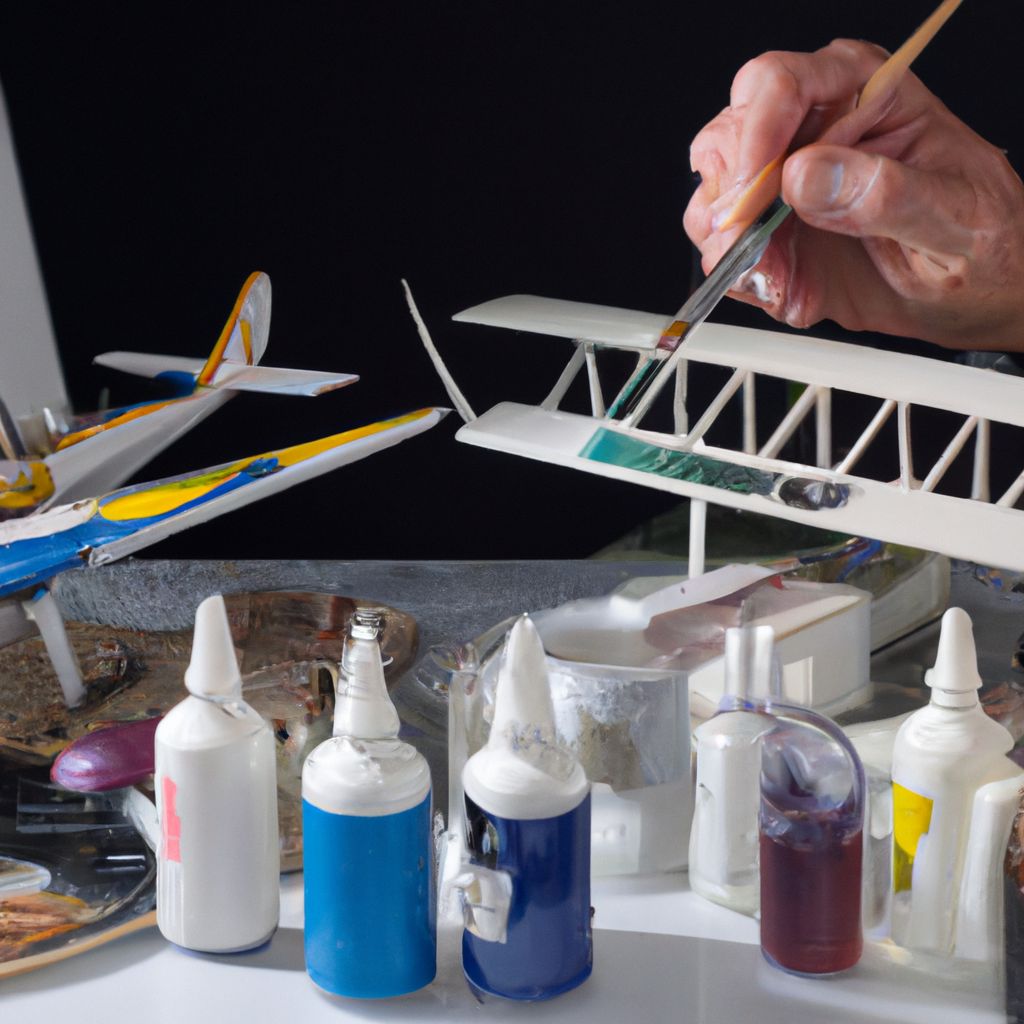
Painting and detailing your model airplane is a significant part of the building process. This stage breathes life into your model, transforming it from a simple assembly of plastic or wood into a realistic miniature replica of an airplane. Here are some tips to help you achieve impressive results.
Firstly, start by applying a primer. This helps to reveal any imperfections that need to be addressed before painting and provides a good base for the paint to adhere to. Primers are typically available in spray cans or bottles for airbrushing.
Next comes the main paint job. Acrylic paints are a popular choice among modelers due to their fast drying time and ease of use. Start by painting large areas first, and then move on to smaller details. Using a good quality brush can make a significant difference in the finish. Thin your paint to achieve a smooth, even coat, and allow each layer to dry fully before applying the next.
After painting, you can add depth and realism to your model by using techniques such as dry brushing and washing. Dry brushing involves lightly brushing a lighter color over the surface to highlight raised details, while washing involves applying a thin, dark-colored paint to recessed areas to create shadows and depth.
Decals add the final touch of detail to your model. These are tiny stickers that represent markings and insignia found on real aircraft. Applying decals requires a steady hand and a lot of patience. To make the process easier, consider using a decal solution which helps to soften the decals and conform them to the model's surface.
Finally, apply a clear coat to protect your paint job and give the model a finished look. This can be either matte or glossy, depending on the desired effect.
Remember, practice makes perfect. Your first few models might not turn out as you imagined, but with each build, you'll improve your painting and detailing skills and develop your own style. Don't be afraid to experiment and most importantly, have fun!
Section : The Thrill of Flying Model Airplanes
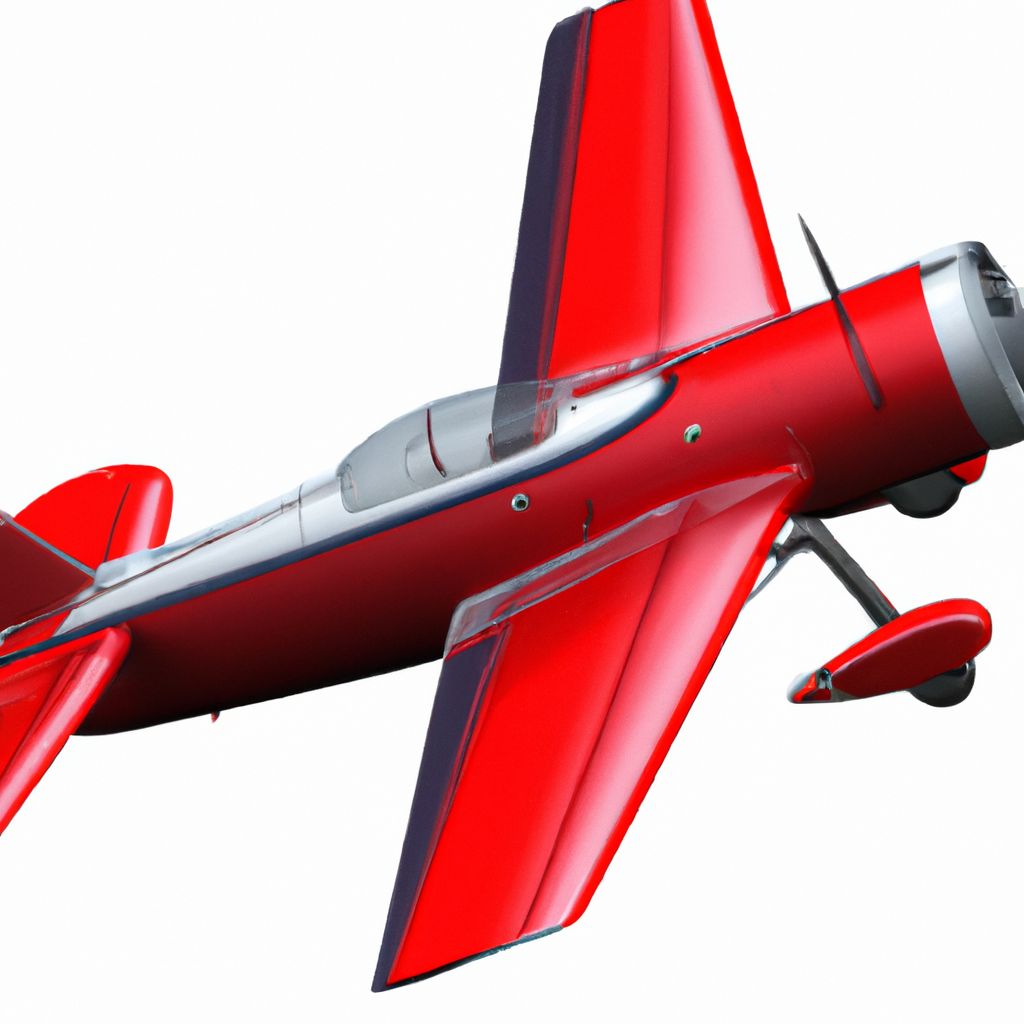
While building model airplanes is an art, flying them is an exhilarating adventure. There's a certain thrill that comes from watching a model airplane, which you've meticulously assembled and painted, take to the skies. Whether you're flying a simple free-flight model or a complex radio-controlled jet, the joy of flight is an integral part of the model airplane hobby.
For beginners, launching a free-flight model and watching it glide through the air can be a rewarding experience. These models, powered by a rubber band or a simple motor, follow a pre-determined flight path based on their design and the conditions of the day. The goal with free-flight models is often to achieve the longest flight time, which can be a fun and competitive challenge.
Control-line models offer a more hands-on flying experience. These models are connected to the pilot by a pair of lines, allowing the pilot to control the elevation and speed of the aircraft. Flying a control-line model involves a certain rhythm, as the pilot must walk in circles following the path of the model. This type of flying can be a great stepping stone to more advanced forms of model flight.
Radio-controlled (RC) models represent the pinnacle of model flight. These models can be controlled in all three axes of flight: pitch, roll, and yaw. This allows for an incredible range of maneuvers, from simple turns and loops to complex aerobatic stunts. Flying an RC model requires practice and skill, but the level of control and realism it offers makes it a popular choice among many modelers.
No matter which type of model you choose to fly, always remember to follow safety guidelines and respect others in your flying area. Model aviation is a hobby that should be enjoyed responsibly.
The thrill of flying model airplanes is not just about the physical act of flying. It's about the anticipation as you prepare for takeoff, the concentration as you control the model in flight, and the sense of achievement when you land successfully. It's a joy that has captivated enthusiasts for over a century, and will continue to do so for years to come.
Subsection : Preparation before the First Flight
Before you take your model airplane to the skies for the first time, there are several steps you should take to ensure a successful and safe flight. These preparations are crucial, whether you're flying a simple free-flight model or a more complex radio-controlled airplane.
Firstly, check the condition of your model. Ensure all parts are securely attached and that there are no loose or damaged components that could affect the flight. If your model is radio-controlled, check the condition and charge of your batteries. A failed battery during flight can lead to a loss of control and potentially damage your model.
Next, check the weight and balance of your model. The center of gravity (CG) of a model airplane can significantly affect its flight characteristics. Your model's instructions should indicate where the CG should be. You can adjust the model's balance by adding or removing weight, or by shifting components within the model.
For radio-controlled models, test your controls before the flight. Ensure your transmitter and receiver are properly bound and that all control surfaces respond correctly to your inputs. This includes checking the direction of the controls to ensure they move the correct way.
Finally, choose the right location and conditions for your flight. An open, unobstructed area is best for flying model airplanes. Check the weather conditions before you fly, avoiding strong winds or rain which can make flying more difficult.
Remember, preparation is key to a successful flight. Taking the time to properly prepare your model before each flight can help prevent accidents and ensure a fun and rewarding flying experience.
Subsection : Basic Flight Techniques for Beginners
Learning to fly a model airplane can be a thrilling but challenging experience. Understanding basic flight techniques can make your initial flights more successful and enjoyable. Here are a few fundamental skills that every beginner should master:
Takeoff: The first step in any flight is a successful takeoff. For free-flight and control-line models, this can be as simple as giving the model a gentle push or toss into the wind. For radio-controlled models, gradually increase the throttle while keeping the model straight with gentle inputs on the rudder. Once the model has enough speed, a slight pull back on the elevator should lift it off the ground.
Basic Maneuvers: Once you're in the air, start by practicing basic maneuvers. This includes turns, climbs, and descents. For turns, gently use the ailerons (or rudder for three-channel models) and a bit of elevator to keep the nose from dropping. For climbs and descents, use the elevator and adjust your throttle as needed.
Trimming: Trimming involves adjusting the neutral position of your controls to keep the model flying straight and level with no input. Most transmitters have trim buttons that you can adjust during flight. If your model consistently veers in one direction, use the trim to correct it.
Landing: The goal of any flight is to land safely. Reduce your throttle and allow the model to descend gradually. As you get closer to the ground, level off and let the model touch down gently. Practice makes perfect with landing, so don't be discouraged if your first few attempts are a bit rough.
Remember, the key to learning to fly is patience and practice. Start with short, controlled flights and gradually push your boundaries as you gain confidence and skill. Most importantly, always fly in a safe and responsible manner.
Subsection : Advanced Flying Techniques for Experienced Pilots

Once you've mastered the basics of flying a model airplane, you can start exploring more advanced flying techniques. These can range from precision aerobatics to scale flying, each providing its own unique challenges and rewards. Here are a few advanced skills that experienced pilots can aim to master:
Aerobatics: Aerobatic maneuvers are an exciting way to showcase your flying skills. These can include loops, rolls, spins, and inverted flight. Always ensure you have ample altitude before attempting an aerobatic maneuver. Start by practicing high in the sky, and as you gain confidence and precision, you can gradually bring your maneuvers closer to the ground.
Scale Flying: Flying your model in a manner that mimics a full-sized aircraft can be a rewarding challenge. This can involve taking off and landing realistically, flying at scale speeds, and even performing maneuvers typical of the aircraft you're flying. This requires not just skill, but also a thorough understanding of your model and its full-sized counterpart.
Formation Flying: Flying in formation with other models can be a thrilling experience. This requires a high level of skill and coordination, as you need to maintain a consistent position relative to the other models while also controlling your own aircraft. Start with simple formations and gradually work your way up to more complex arrangements.
Thermal Soaring: Thermal soaring involves using rising columns of warm air, known as thermals, to gain altitude and extend your flight time. This technique is particularly popular with glider pilots, but can be used by any model capable of slow, controlled flight. It requires a keen understanding of weather conditions and the ability to read subtle cues from your model and the environment.
Remember, advanced flying should always be done in a safe and responsible manner. Always ensure you're flying in a suitable location and that you're respecting other pilots and spectators. Advanced flying can be a thrilling way to challenge yourself and showcase your skills, but safety should always be your top priority.
Section : The Benefits of Model Airplane Hobby
The world of model airplanes offers much more than just the thrill of flight. This hobby, which has captivated enthusiasts for over a century, brings a host of benefits that can enrich your life in various ways. Whether you're a seasoned modeler or a beginner just starting out, the model airplane hobby has something to offer for everyone.
Educational Value: Building and flying model airplanes can be a fantastic educational experience. It provides a hands-on way to learn about the principles of aerodynamics, physics, and engineering. It also offers insights into the history and evolution of aviation, from the earliest biplanes to the most advanced modern jets.
Skill Development: The process of building a model airplane involves a range of skills. From the delicate hand-eye coordination required to assemble tiny parts, to the precision and patience needed to paint and apply decals, model building can help develop and refine these skills. Flying model airplanes also requires skills such as spatial awareness, manual dexterity, and problem-solving.
Creativity and Artistry: Model airplanes are more than just miniature replicas; they are works of art. The process of building and detailing a model allows you to express your creativity and artistic flair. Whether you're replicating a historical aircraft or creating a fictional plane from your imagination, each model is a unique expression of your personal style.
Social Connections: Model aviation is a hobby that brings people together. Whether through local clubs, online forums, or competitions, you can connect with fellow enthusiasts to share experiences, learn from each other, and form lasting friendships. The model airplane community is a welcoming and supportive one, where everyone from beginners to experts can find their place.
Relaxation and Satisfaction: Building and flying model airplanes can be a great way to relax and unwind. The focused attention required can help clear your mind and reduce stress. There's also a great sense of satisfaction and accomplishment that comes from completing a model or successfully flying a plane that you've built yourself.
Whether you're drawn to the hobby by a love of flight, a passion for history, or the simple joy of creating something with your own hands, the world of model airplanes has a wealth of benefits to offer.
Subsection : Educational Benefits

Subsection : Mental and Physical Health Advantages

Subsection : Community and Social Aspects

Conclusion: Encouraging Others to Explore the Joy of Flight